
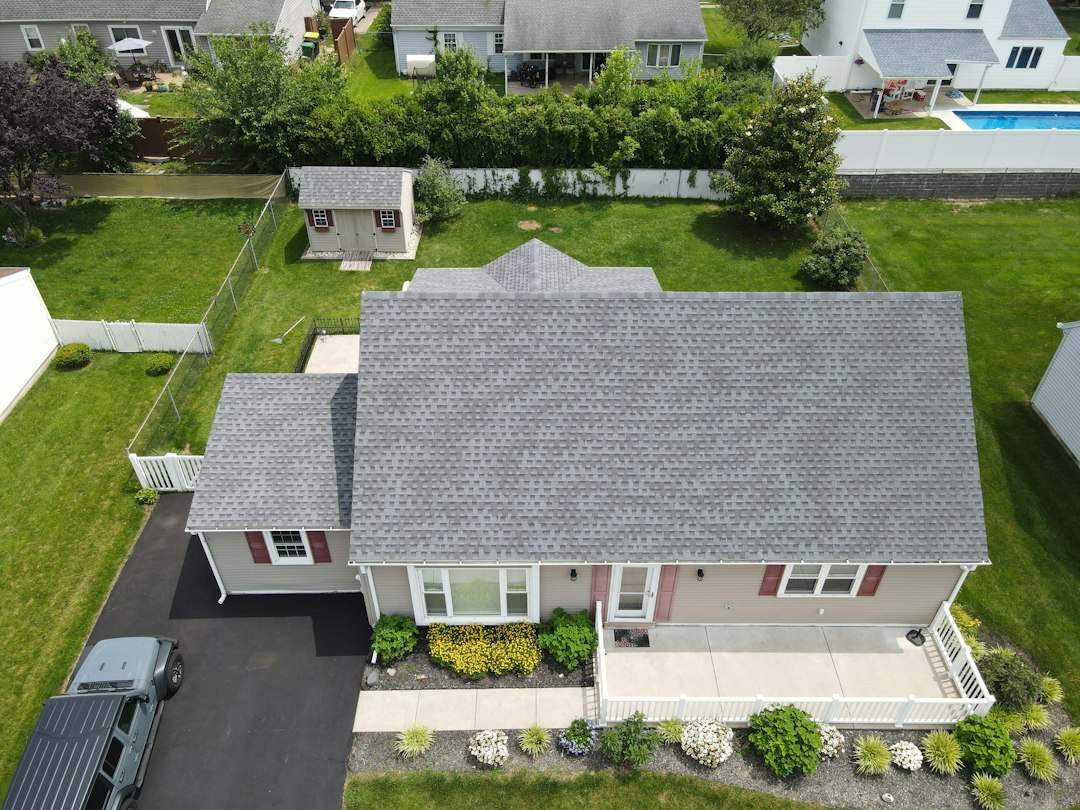
Roof inspection checklist: 12 Areas to Check and Record
A roof inspection checklist helps you review a roof in a clear order and turn visible defects into clear next steps. It should cover the roof surface, flashing, drainage, edges, penetrations, and signs of water inside. However, a checked box alone says little. A useful record also names the area, shows the evidence, and explains what needs further review.
This checklist covers 12 inspection areas, a simple roof inspection form, defect priorities, and a worked reporting example. Homeowners can use it to organize ground-level observations. Roofing firms and property managers can adapt it for a expert visit, with extra fields for the roof system and contract scope.
Start with the inspection scope and safe access
First, decide what the visit can establish. A visual maintenance check differs from a leak investigation, a storm assessment, or a pre-purchase survey. Each asks different questions. Therefore, record the purpose before anyone starts taking photos.
Use ground views, accessible interior areas, and suitable remote images where possible. Leave roof access to people with the training, equipment, and site controls for the task. Never step onto a surface whose condition you cannot judge from a safe position.
The NRCA guidance on maintaining residential roofs recommends spring and fall checks and further inspections after severe weather. It also cautions inexperienced owners against walking on roofs. Treat those intervals as a starting point, then check the roof warranty and site-specific maintenance needs.
Before the visit, gather earlier reports, repair invoices, plans, and warranty details. In addition, ask occupants when leaks appear. Wind direction, rainfall, and the timing of a stain can help a roofer plan the investigation without assuming that the visible stain marks the entry point.
The 12-point roof inspection checklist
1. Roof identity and background
Record the property address, building section, roof type, and approximate installation date if known. Separate confirmed facts from the owner’s estimate. For example, write “owner reports replacement around 2017” rather than treating that year as a verified date.
Next, note recent works. Solar panels, vents, signs, and rooftop equipment can change access routes and create new inspection points. Give each roof section a name so later reports refer to the same area.
2. Interior ceilings and walls
Look for visible staining, peeling finishes, damp patches, and reports of repeat leaks. Photograph both the wider room location and the detail. However, avoid calling a stain an active roof leak without evidence. Plumbing, condensation, and past damage may produce similar signs.
Ask whether the patch changes after rain. Then record the answer as an occupant report. This keeps the observation separate from a diagnosis and helps the specialist choose the next test.
3. Accessible attic or roof-space clues
Where access is safe and within scope, note visible moisture marks, daylight through unintended openings, and signs of poor ventilation. Do not disturb insulation or walk on unsupported ceiling surfaces. If the area is inaccessible, state that limit rather than marking it satisfactory.
For example, “rear roof space not accessed because no safe access hatch was available” tells the next inspector far more than an empty field.
4. Shingles, tiles, or metal panels
Check the visible covering for missing, cracked, slipped, distorted, or loose pieces. Identify the material because defects and repair methods differ. In addition, record whether the issue affects one small location or repeats across a roof section.
A close photo may show a broken tile, while a wider view shows its place on the slope. Use both when possible. Do not infer the condition of hidden layers from the surface alone.
5. Low-slope membranes and seams
For a low-slope roof, have the trained inspector review visible seams, patches, punctures, and surface changes. Record the membrane type if records confirm it. Otherwise, keep the description neutral until a specialist names the system.
Next, compare new observations with older photos. A patch that looks unchanged may still need review, but the history helps explain whether movement or deterioration has progressed.
6. Flashing at walls and chimneys
Review visible flashing where roof planes meet walls, chimneys, and other structures. Note gaps, lifted edges, corrosion, and signs of earlier repairs. However, do not assume that adding sealant offers a suitable permanent repair.
GAF’s roof damage guidance highlights damaged flashing, missing covering, and interior leak clues as useful inspection points. Use those clues to request further review rather than to diagnose a whole roof from one photo.
7. Vents, skylights, and other penetrations
List each penetration and its location. Then record visible damage to boots, curbs, surrounding flashing, and nearby surfaces. A repeated field for each asset works better than one box labelled “vents checked.”
Also note access restrictions from equipment. If a panel or unit blocks the view, explain which part remains uninspected. The owner can then arrange access for a focused return visit.
8. Valleys and roof junctions
Look for debris, visible damage, and signs that water may leave its intended route. Record the valley’s start and end points so another person can find the issue. Meanwhile, distinguish a blocked surface from a suspected defect below the covering.
For roofs with several levels, check how upper areas drain onto lower ones. The report should describe the path, especially where staining or repeated repairs occur.
9. Gutters, outlets, and downspouts
Check visible debris, loose sections, damage, and disconnected joints from safe positions. Note where each downspout discharges. A clear gutter does not prove that the whole drainage route works, so record the limits of a dry-weather inspection.
If a contractor performs a flow test, list the test scope and findings separately. This helps the owner distinguish a visual review from a tested drainage system.
10. Roof edges, fascia, and soffits
Record visible deterioration, gaps, loose trim, and evidence of animal entry. Include the elevation and nearby landmark. For example, “east eave above utility door” is easier to act on than “side edge damaged.”
Also note any loose material that could fall. That may need prompt site controls even before the roofer decides how to repair the underlying cause.
11. Drainage patterns and surface water
On low-slope roofs, record visible standing water and the time since rainfall if known. Do not judge drainage from a puddle alone. Roof design, weather history, outlet condition, and the system’s rules all matter.
Instead, preserve the observation and request a trained assessment where needed. Photos from repeated visits can show whether water collects in the same place.
12. Earlier repairs and unresolved findings
Compare current conditions with the past report. Identify repairs that the owner approved, work that a contractor done, and items that still await review. These are separate states and should not share one “done” box.
Finally, link each open finding to an owner and a due date. Without that handoff, an inspection can become a photo archive rather than a maintenance plan.
A roof inspection form you can copy
Use this structure as a starting point. Add roof-specific fields with your contractor, and keep “not inspected” separate from “no visible defect.” The form should preserve doubt instead of hiding it.
- Property, roof section, inspection date, inspector, and weather.
- Purpose, agreed scope, roof material, and records reviewed.
- Access method and areas outside the inspection scope.
- Item number, exact location, observed condition, and photo reference.
- Urgency, recommended next action, responsible person, and target date.
- Repair approval, completion evidence, and final checks date.
For a simple status set, use “no visible issue,” “defect noted,” “further review needed,” and “not inspected.” In addition, include a comment whenever the last three apply. That makes a later review much easier.
Set priorities without guessing the diagnosis
Prioritize the consequence and the need for action. An active water entry, unstable material, or unsafe access condition deserves prompt attention. A minor cosmetic concern may fit planned maintenance. However, the final response should reflect a trained assessment and the building’s use.
| Finding | Useful next step | Record to retain |
|---|---|---|
| Active indoor water entry | Protect occupants and arrange prompt assessment | Location, timing, photos, response |
| Blocked visible outlet | Arrange safe clearing and drainage review | Before and after evidence |
| Unclear surface defect | Request a specialist inspection | Exact area and unanswered question |
| Unseen roof section | Arrange suitable access | Scope limitation and return plan |
Do not use a priority label as proof of cause. For example, a repeat stain may require urgent attention even though the source remains unknown. A good report says both things clearly.
Worked example: from photo to verified repair
Imagine a property manager sees a ceiling stain after rain. The inspector records “stain above rear corridor,” adds a room photo, and maps it to roof section B. A roof-level review then finds a visible gap at a nearby penetration, but the report does not claim that the gap caused the stain without further checks.
Next, the roofer proposes an investigation and repair scope. The manager approves it under a separate work order. After the work, the roofer uploads completion photos and explains what changed.
Finally, the manager records the final checks plan. Depending on the job, this may include a suitable test or monitoring during later rain. The original inspection stays intact, while the repair and follow-up records link back to it.
Use digital records when repeat visits become hard to manage
A spreadsheet may suit one property. However, firms with many buildings often need photo capture, asset histories, reminders, and review controls. An inspection checklist app can help structure those field records without treating every checked item as a technical approval.
For broader property work, a property maintenance management system can connect a roof finding to a work order and budget. Keep the inspection report available even when staff revise the repair plan.
If your team needs unusual approval steps or owner portals, custom crm development may help connect customer records to service visits. Start with a stable inspection process first. Software cannot supply missing evidence or replace a trained roof assessment.
Questions to ask before accepting the report
Ask whether the report covers every roof section named in the scope. Next, check that each photo has a location and that the summary matches the detailed findings. A statement that the roof needs attention should lead to a defined assessment or work scope, not an unexplained replacement recommendation.
Also ask which advice depend on further access or testing. For example, the contractor may need to inspect a concealed junction before pricing a permanent repair. Keep that doubt in the estimate instead of treating the first visit as a full design.
Finally, check the owner handoff. The report should name urgent actions, planned work, and monitoring tasks in plain language. If the owner must arrange access or contact another trade, name that action explicitly. A technically useful report still needs someone who can carry the next step forward.
Frequently Asked Questions
Can I inspect my roof from the ground?
You can note visible covering, edge, and drainage concerns from a safe position. However, record what you cannot see and ask a roofing expert to assess those areas when needed.
Does a roof inspection prove there are no leaks?
No. A visual visit reflects its scope and conditions. Hidden defects or leaks that occur only in certain weather may need a focused investigation.
Should every defect include a photo?
A photo usually improves the record, but location and written context still matter. Where a photo is unsafe or impossible, explain the limit and the needed follow-up.
Turn the checklist into a maintenance plan
Use the roof inspection checklist to capture a clear view, not to promise certainty beyond the visit. Record the scope, inspect each right area, and give every unresolved finding a clear next step. Then keep repair evidence and follow-up results with the original report.
Keep roof visits and repair follow-ups together
Anomoz Softwares can help roofing and property teams connect inspection forms, photos, work orders, and customer updates.